Showing posts with label 3D. Show all posts

Summer Project 03 - Trim Sheets (19th Century Renaissance Furniture)


Goals for the project:


  • Understand the trim sheet pipeline 
  • Utilize Substance designer or Maya to create a trim sheet as well as tile materials.
  • Document and demonstrate the (Ultimate trim sheet) method mixed with (Worn Varnished Wood Master Material)
  • Create multiple 19th Century Renaissance furniture pieces utilizing the trim sheets and display the final results in UE4
  • Finally, Display the final model in a scene posted to add more action and interest. 
MileStone 02 (07-22-2018)

Took a lot of time and research but I am finally happy with my understanding of trim sheets as a modeling concept. To test out the pipeline I tried my hand at creating a quick and dirty version of the first dresser, utilizing the trim sheet and packed RGB uv2 texturing method.  Here are my results in UE4.


MileStone 04 (08-07-2018)

Here is the current state of this little project. I am pretty happy with the overall concept and think now have a good understanding of how the trim sheet workflow works. I want to try and push this further by supplementing other furniture pieces,

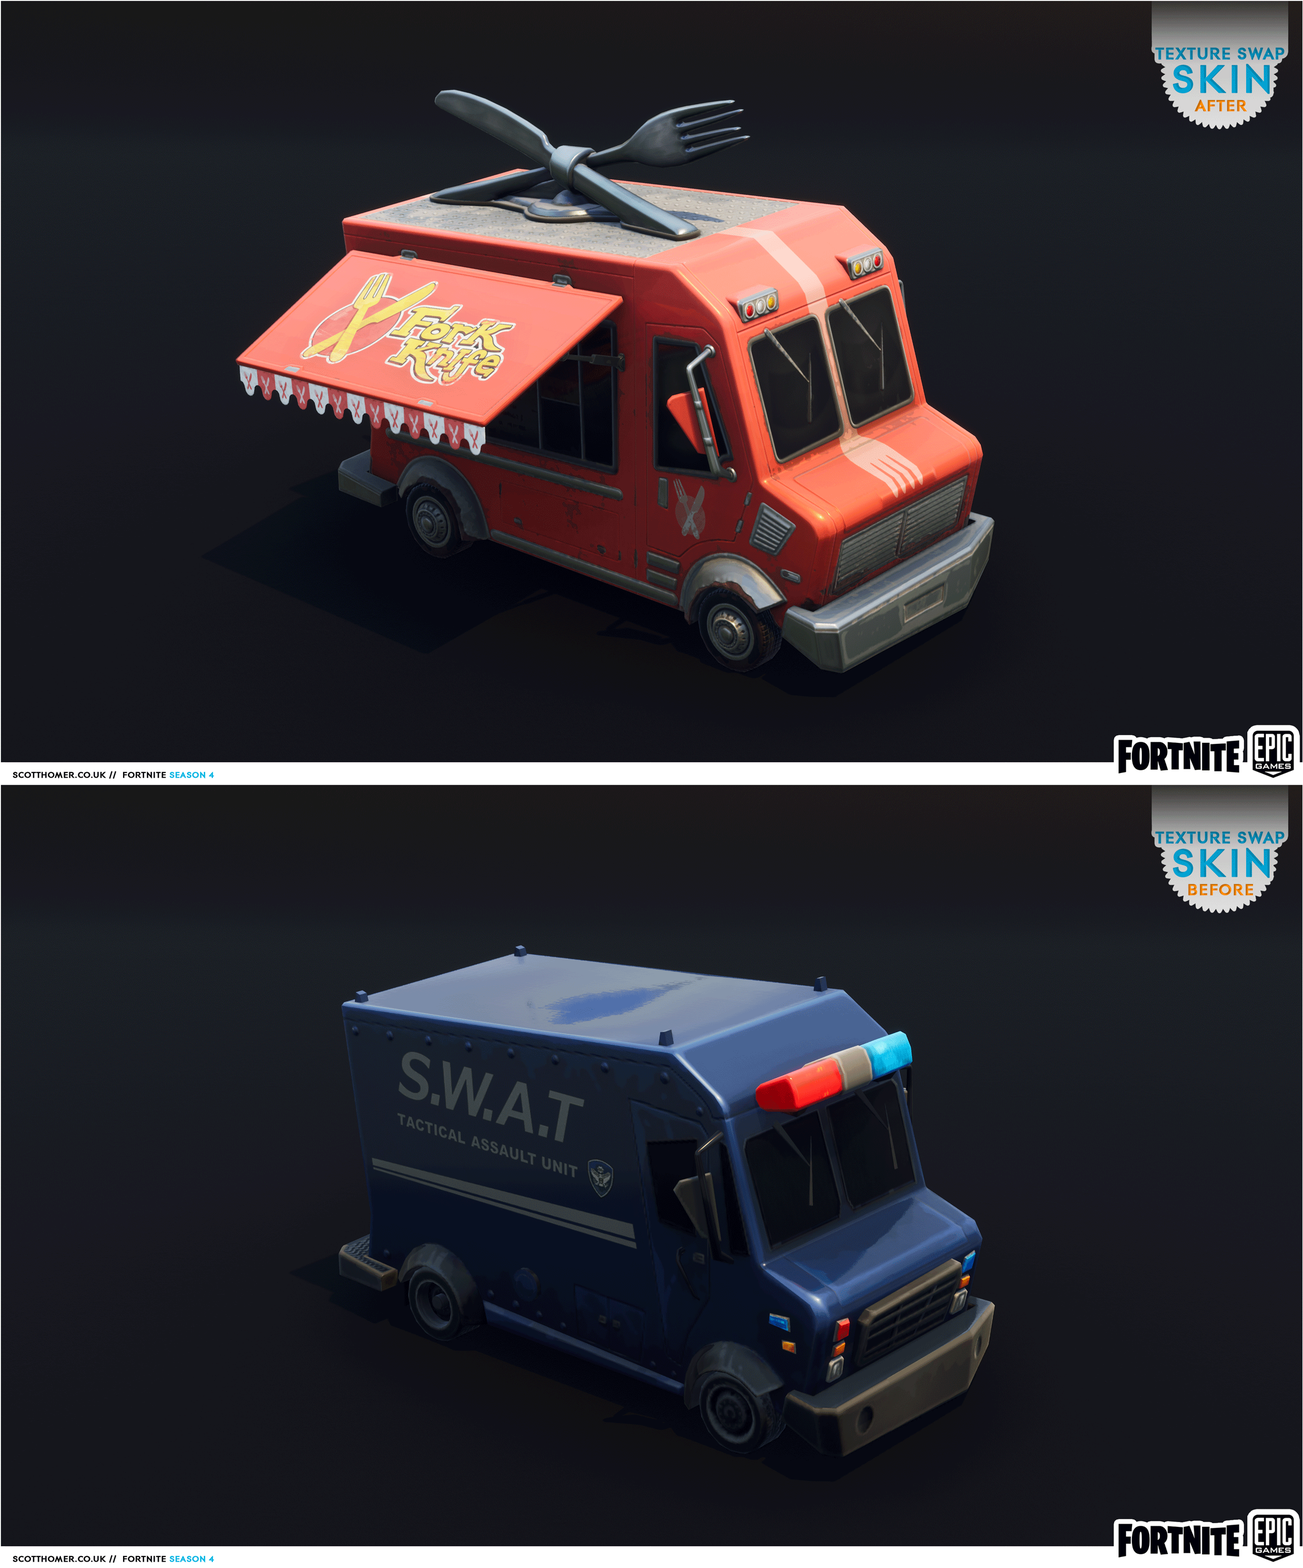
Summer Project 02 - News Truck (FortNite)


Goals for the project:


  • Recreate the concept of the reference image in the vane of Fortnite by Epic Games. 
  • Utilize Substance designer to create a wall and floor that will be displayed alongside the Truck. 
  • Finally, Display the final model in a scene posted to add more action and interest. 

Reference: 

Goal: 


Schedule:
Project Begins 05/14 and ends 06/13

06/11 - 06/17:

  • Finish Old Project Summer Project 01 Final Rendering 
  • Start Blockout of Summer Project 02 News Truck


06/18 - 06/24:

  • High Poly Pass on every major shape
  • Set up display in Marmoset


06/25 - 07/01:

  • Resurface truck 
  • UV low Rez model
  • Work on Texturing 
  • Start Substance designer aspects 


06/06 - 06/13:

  • Final Texturing 
  • Finish Substance Designer props
  • Set up Rendering Passes 


Mile Stone 02 Submission (06-24-18)

A little behind in this milestone. However, I am making progress on the high poly stage and found a good scene set up in marmoset.


Mile Stone 04 Submission (07-08-18)

Wooo final turn in


Summer Project 01 - PsychicStoreFront


Goals for project:


  • Learn more about modularity and making environmental kits
  • Recreate a realistic Unreal shot that closely matches up to a photograph image 
  • Integrate Substance Designer workflow directly into Unreal
  • Learn more about how to create ware and tear using material blending in UE4
  • Learn how to mimic the lighting by matching the master reference shot
  • Learn about the creation of cloth in Marmoses designer
  • Learn about the creation of neon light in UE4


What is the environment:
A small snapshot of a weathered New York City Psychic storefront at night. A heavy focus on realism.

Mood:
For this project, I wanted to create a more mysterious inviting mode that is represented in the concept image. As you are walking back from a late night of work, you stumble upon this rundown psychics storefront.

Possible complications:
I think a complication of this project might be the lighting due to how strong the contrast in the lights are, ranging from very dark to very light neon.

Props vs Building models


List of props:
  • Folding Door Gate
  • Display Case Props
    • Neon Sign
    • Hand Palm Guilds
    • Photo Frames
    • Head Bust
    • Stretched Male Statue
    • Tarot cards
  • Neon Sign
  • Neon Sign Power Cables
  • Frame
  • Curtains
  • AC unit with a Plastic cover

List of Building Assets:

  • Display Box “StoreFront”
  • Two Small Doors
    • Door Lock
  • Wall Pillars
  • SideWalk Curb
  • Sidewalk Cellar Door
  • Awning

Substance Designer Materials

  • Chiping Painted wood Yellow
  • NYC Sidewalk 


Schedule:
Project Begins 05/14 and ends 06/13

05/14 - 05/23:

  • Blockout Pass in maya representing every props and shape that will be in the final scene. 
  • Base UE4 scene set up, begin importing props
  • Working on lighting
  • UE4 Camera Set up


05/23 - 05/30:

  • High Poly Pass on every major building asset 
  • Display Box “StoreFront”
  • Two Small Doors
  • Door Lock
  • Wall Pillars
  • SideWalk Curb
  • Sidewalk Cellar Door
  • Awning
  • Door Lock
  • Continue Lighting 
  • Work on Neon Light in UE4


05/30 - 06/06:

  • High Poly Pass on Props in the display case
  • Folding Door Gate
  • Display Case Props
    • Neon Sign
    • Hand Palm Guilds
    • Photo Frames
    • Head Bust
    • Stretched Male Statue
    • Tarot cards
  • Neon Sign
  • Neon Sign Power Cables
  • Frame
  • Curtains
  • AC unit with a Plastic cover
  • Resurfacing and texture work on Building Assets
  • Lighting
  • Substance designer Materials


06/06 - 06/13:

Resurface and Texture Props
UE4 final render + marmoset scene

Mile Stone 01 Submission (05-21-18)

This milestone I was able to complete everything task I set for my self. I also made a google sheets document in order to keep up help with project management.

 
So here is the Maya block out.


And here are the assets imported into UE4


Mile Stone 02 Submission (05-28-18)


Ok time for Milestone 2 due to date (Half way). While I have been making good progress overall I think I might be a little behind of my original goal for this turn in. It had been hard balancing 3 different projects at the same time.

I did get a chance to make some substance designer textures for the sidewalk and learned a little more about material instancing as well as Vertecy colors and material functions. 

I broke down all the assets in my Maya scene and placed them individually into UE4, setting up the bridge for the geo. I am in the process of getting the first pass on as many structural assets as I can, in order to have texture files linked. 


Mile Stone 04 Submission (06 -10 -18)


Final turn in, some of the props still need a lot of work. However, its time to turn something in.


Week 11 Mid Complexity Character


(Project OverView

The goal of this project is to create a hero prop for an upcoming environment project set in an alternative 80s kids tree house. The idea for this guy was to create an alternative gaming control with futuristic VR capabilities that match the aesthetics of the technology at the time. 

(Final Renders


(Gathering Reference And BrainStorming) 

The main inspiration for this project was the Fetch Robotic assistant. However, I wanted to create something that would look and feel like an alternative 1980s retro VR projector game console. My plan is to use this model as a hero prop for my next environment project. Which will be set in an alternative retro 1980s treehouse. 

So to get that feeling I know I needed to get some CRT monitors as the reference along with some old projectors.


(HighPoly Blockout Attempt 01)

This was my first attempt at the high poly block out of this model made using smooth mesh preview in Maya. However, I was not too happy with the projector arm and the lower base section. The big characteristics i am trying to really nail down would be the soft edge blocky plastic look that early game controls were made from. Something similar to consoles like the Supper Nintendo. 


(HighPoly Blockout Attempt 02)

After the second pass through, I was a lot more happy with how the overall design read. After showing it to some peers I got the feedback that I was looking for, in that it read more like an old gaming console. 

The next step was the push the design and complexity further focusing on more secondary shapes such as vents, paneling, and screws. I find it a really helpful to imagine how the shapes would have been manufactured when placing the screws, as well as how the panels would separate and where you might want to add grooves for screwdrivers wedges.  


(Texturing  Base Setup)

The majority of this project was textured in Substance painter. I find it easier to startout creating the master materials and organizing them into layers before starting with the smaller detail like scratches, dirt, glowing objects, and grooves. 


For my base material I started by using this SciFi PVC plasticfound in the standard material folder in Substance painter. I ended up changing multiple elements however, things like the diffuse, and roughness. Then later I would come back and add dirt variations. 


I found this Wood American Cherry on Substance Share, then added a clear coating and removed the damage variations in order to get that plastic vinal wood feel. 


For the black materiel, I created this basic material in substance painter. It is just a black basic fill layer with some roughness, then I added a extra layer of height by plugging in a perlin noise generator.

(Texturing  Project Setup)

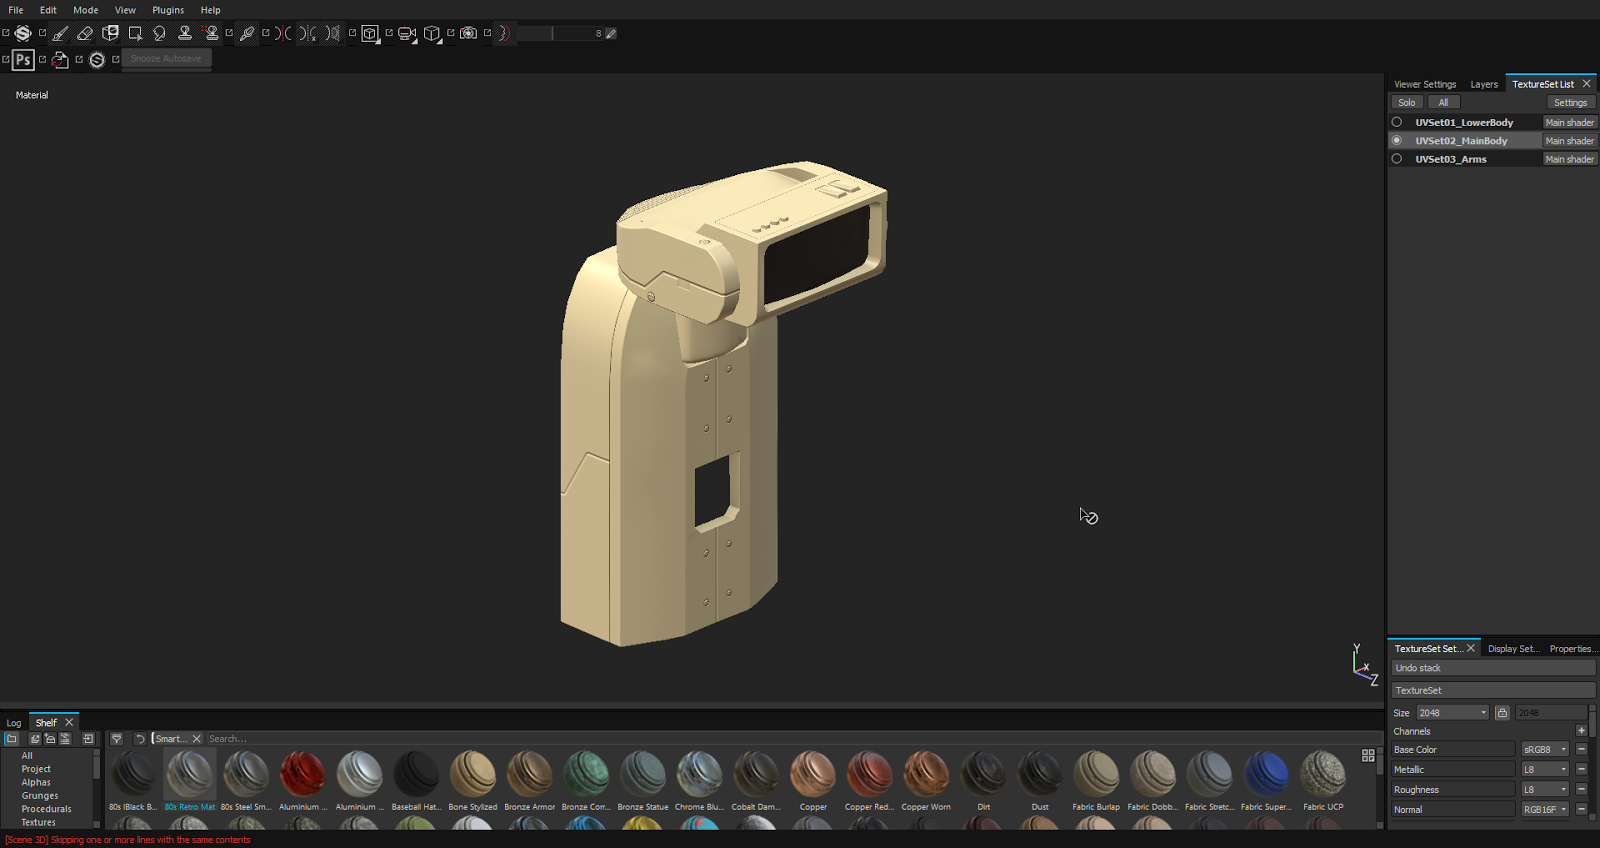
To maintain the level of polish and complexity i wanted for this hero prop, I choose to divide the model into 3 texture sets. This requires you export your model from your 3d program (in my case Maya) as one object with multiple materials. This helps substance painter understand that you want each mateial to be its own texture UV set.  More on this topic can be found here.   https://www.youtube.com/watch?v=2NFXuFQYjvo


(Texturing  UVSets Setup)

UVSet 02 - Base Body

UVSet 03 - Arm

UVSet 01 - LowerBody

Breaking the model up like this can, really make it easier to focus on each section  
The final texture model in Substance Painter.

(Final Model Marmoset Render)


(Zbrush High-poly)


(Final Model UE4 Render)